-->

Featured Posts Coolbthemes

Pages

Showing posts with label Tech Tricks. Show all posts


Hey guys today we are here with a great trick. From this trick you will be able to download paid apps free from play store. Well downloading paid apps free directly from play store is not possible as we guess it was done in past but not possible now because Google has fixed vulnerabilities in Play Store but there are some methods still alive that work similar. Now you can get paid apps free without any kind of hack at all. So guys let's go for simple trick.


Steps to Follow : 

Step 1 : Download Get Apk Market  and Install it on your device.

Step 2 : Open play store and search for the app you want to download.


Step 3 : Now scroll down and click on Share button.


Step 4 : Now Select GetApk Market.


Step 5 : Now wait until it load. 
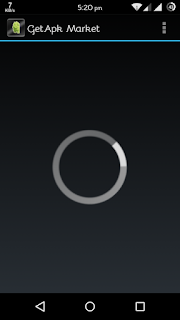

Step 6 : Click on Get to download app.

 Step 7 : Choose any green colored Mirror
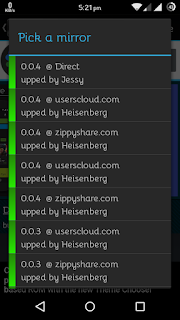

Step 8 : Wait until it loads if it takes longer time than click on "Open in Browser" 


Step 9 : Wait for a few seconds and skip Ad than you will be redirected to download page.


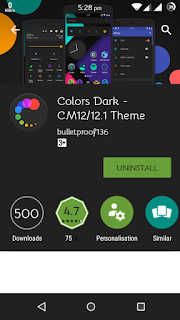
Step 10 : Download your app and install it.


Step 11 : Now enjoy your paid app for free :)

If you are having any trouble in any step then leave your precious comments for us :)
Read More

Hey guys, today we are here with a trick for a small problem that was faced by any unknown person who visited our website to downgrade his/her LG G4 back to lollipop 5.1.1. We are thankful to him for sharing his problem with us and for him and other LG G4 users we are here to fix an error after downgrading the phone. The unknown user told us that he is finding an error on rebootin his phone and the error was "Current version is not available for user. Can't find matched cust for NT-Code MCC/MNC[FFFFFF],SUBSET[56]".


So guys if you are having any this type of error like above on rebooting then don’t be feared about that as all these errors comes because the firmware are made different for different countries and you are probably using an international firmware. It’s a simple trick to correct the error and I know that error annoyed you a lot but from now you are going to be free from this error.


Note :- According to your firmware you could see any error of the type above but the error is same if it appers like "Current version is not available for user. Can't find matched cust for NT-code MCC/MNC[XXXXXX],SUBSET[XX]",i.e., there could be anything instead of ‘X’.

Let’s begin the trick :)


Requirements :


* Root Access in your LG device.
* ES File Explorer App


Steps to fix the error :


* Open ES File Explorer app.
* Go to the “root” folder of your device.
* Search and go to the "Cust" folder.
* Open the "cust_path_mapping.cfg" file with “ES Text Editor”.
* At the top(or bottom), give a space to add a new line.
* Type the following : XXXXXX,XX=/cust/OPEN_IL. ( Replace the characters of your own like for the unknown user the characters are “FFFFFF,56=/cust/OPEN_IL”).
* Now, save the file.

Note :- You may be asked to enable Read-Write capabilities, so allow the ES File Explorer to do so.
* Now reboot your phone and get rid of that annoying error.

Remember :- As I told you firmware is different for different countries, so in case if your are using a European device, and the above edited character does not work, then just replace "OPEN_IL" with "OPEN_EU" and for US devices replace with “OPEN_US” and so on. One mor thing I want to tell LG users that LG G3 users can also use same process to fix this error.


That’s it guys enjoy with your phone and be connected with us and give your precious comments to us :)

Read More

Hey guys, today we are going to guide you that how can you flash a custum ROM in Asus Zenfone 5.
In the recent days I tried two ROMs : Resurrection Remix and Cynogen Mod 12.1. I found many bugs in Resurrection Remix like Play Store was not working, apps automaticallly stops and it takes too much time to start up again but I'm doing well with Cynogenmod 12.1. 

So without wasting your too much time we are here with our steps :

For Resurrection Remix :


Requirements : 


Step 1 : First of all you have to charge your battery nearly full and your phone must be rooted (if not then see How to Root Your Asus Zenfone 5).

Step 2 : Download all files listed above and place Gapps, Resurrection Remix and Xposed Installer in your SD Card and Extract Platform Tools to Desktop of your pc.
Step 3 : Place the downloaded TWRP Recovery Zip in Platform Tools Folder and extract it and copy recovery.img from files in Platform Tool Folder. 

Step 4 : Open your mobile in droidboot mode. First Power off your device then Press Power button and Volume Up button together and connect your phone to pc.

Step 5 : Now open Platform tools folder and press SHIFT + Right Mouse Button and select open command window here. 

Step 6 : Then type fastboot flash recovery recovery.img then hit enter.

Step 7 : Now select recovery mode then press Power button to select.

Step 8 : Then TWRP Recovery will be opened and from this backup your all data to SD Card and then select Install Option and select external sd from the list appears.

Step 9 : Now, Select Resurrection Remix Rom and swipe to install and after installing it install Gapps and Xposed Installer.

Step 10 : After that wipe cache/wipe dalvik cache and then go to Wipe option and factory reset your mobile and then go to the Reboot Option and Reboot System. 

Starting in first time takes more than 10 minutes after starting register yourself and enjoy with your newly installed Resurrection Remix.

For Cynogenmod 12.1 :


Requirements : 


Step 1 : First of all you have to charge your battery nearly full and your phone must be rooted (if not then see How to Root Your Asus Zenfone 5).

Step 2 : Download all files listed above and place Cynogenmod 12.1 Unofficial and Xposed Installer in your SD Card and Extract Platform Tools to Desktop of your pc.
Step 3 : Place the downloaded TWRP Recovery Zip in Platform Tools Folder and extract it and copy recovery.img from files in Platform Tool Folder. 

Step 4 : Open your mobile in droidboot mode. First Power off your device then Press Power button and Volume Up button together and connect your phone to pc.

Step 5 : Now open Platform tools folder and press SHIFT + Right Mouse Button and select open command window here. 

Step 6 : Then type fastboot flash recovery recovery.img then hit enter.

Step 7 : Now select recovery mode then press Power button to select.

Step 8 : Then TWRP Recovery will be opened and from this backup your all data to SD Card and then select Install Option and select external sd from the list appears.

Step 9 : Now, Select Cynogenmode 12.1 Unofficial and swipe to install.

Step 10 : After that wipe cache/wipe dalvik cache and then go to Wipe option and factory reset your mobile and then go to the Reboot Option and Reboot System. 

Starting in first time takes more than 10 minutes after starting register yourself and enjoy with your newly installed Cynogenmod 12.1 Unofficial.


Note : Both Resurrection remix and Cynogenmod 12.1 looks same because the Resurrection Remix is based upon the Cynogenmod.


If you are facing any problem in the above steps then you can reach us by comment or contact form. We would love to help you :)
Read More

Hey guys, a few days before when I was trying to unroot my Asus Zenfone 5 it just stucked in between and it did not opened till 15 minutes was over then I came to know that there is a bootloop in my mobile.

Then I worked on it more than 5 hours and made my phone perfect but I lost my all data and contacts from my internal memory. So if you  get in this problem anyhow you will not suffer for more than 30 minutes if you folly this tutorial. I am providing you the simple and best steps and you can be able to recover your all data from your internal memory. So be patient and trust me it is as simple as rooting a phone via pc.

You will need some files to be downloaded to perform the work :


So here are the steps that you have to follow to fix bootloop in your Asus Zenfone 5 : 

Step 1 : Extract Platform Tools to Desktop.

Step 2. Copy UL-ASUS_T00F-WW-2.22.40.540-user (1).zip in the Platform Tool folder.

Step 3 : Download TWRP Recovery and extract it and copy recovery.img from files in Platform Tool Folder. 

Step 4 : Open your mobile in droidboot mode. First Power off your device then Press Power button and Volume Up button together and connect your phone to pc.

Step 5 : Now open Platform tools folder and press SHIFT + Right Mouse Button and select open command window here. 

Step 6 : Then type fastboot flash recovery recovery.img then hit enter.

Step 7 : Now select recovery mode then press Power button to select.

Step 8 : Then TWRP Recovery will be opened and from this backup your all data to SD Card and then Power off the phone again.

Step 9 : Now delete TWRP recovery.img from the Platform Tool Folder and open UL-ASUS_T00F-WW-2.22.40.540-user.zip and copy recovery.img from it to the Platfom Tool Folder.

Step 10 : Follow Step 4, Step 5, Step 6, Step 7 again.

Step 11 : Now a recovery window will open showing a android symbol written below No Command. You have to press both Volume Up + Volume Down Button together then an option window will appear.

Step 12 : Now select apply update from adb and then in the command window type adb sideload UL-ASUS_T00F-WW-2.21.40.44-user.zip and leave it until it sends the file to the phone.

Step 13 : After few minutes you will see a message to reboot your phone then reboot and enjoy with your phone.

Note : The TWRP recovery is only used to backup your data if you do not wish to do so then just leave that portion.

Thanks for visiting our blog. If you are getting any difficulty then comment us we are here to help you :)


Read More

Warning

  • This process is only for LG G4 Model-No H815. Do not try this any other phone. If you are completely unaware of this process then you should not do this. If something wrong happens with your phone during or after the process then  we will not be held responsible. So, try this at your own risk. The firmware is official. You will lose root access, if you have, after the process, Thanks.

Things to remember

Check the model of your phone by going to Settings>>About Phone>>Hardware Information. Make sure it is H815 then proceed.

  1. Backup your important data like photos, videos, contacts, messages etc to avoid data loss for safety purpose.
  2. Charge your phone up to 70% to minimize power issues.
  3. Install LG USB drivers on your PC.
  4. Your USB Data cable should be working properly.

What you Will Need

  • LG G4 H815
  • A PC or a Laptop
  • USB Data Cable
Download Required Files
Download:     5.1.1 Lollipop KDZ file for G4 H815
Download:     LGUP Tool
Download:     LG Mobile Drivers

Downgrade LG G4 H815 to 5.1.1 Lollipop Stock Firmware, 

Steps

To downgrade LG g4 H815 to Lollipop, follow the step by step instructions below.

Step-1

  • Fist of all open the above link to download 5.1.1 Lollipop KDZ for LG G4 H815. There will be different lollipop KDZ files for different models. Clink on the H815 file and download Europe Open or Europe General or H81510c KDZ file for your G4 H815 on the PC.
  • Now extract the downloaded file if possible. IF not then let it be same.

Step-2

  • Now download LGUP flash tool on your PC and extract.
  • You will get different files after extracting LGUP tool. Install both of the files on your PC. (install dll file first and then LGUP file)

Step-3

  • After installing LGUP, launch the LGUP flash tool on your PC.

Step-4

  • Connect your LG G4 to the PC. LGUP will detect your phone and it will be listed on the LGUP screen.

Step-5

  • After that, click on the Upgrade option, and choose file path. Select the KDZ file that you downloaded in the first step.
  • You can also select Refurbish option and click on start but this will erase your data and you will undergo a clean downgrade process. This one is most suitable but you can select any option you want. Both works fine.

Step-6

  • Now after all the above steps are done, press the Start button to begin the process and wait till the installation of the firmware completes.
Your device will restart automatically after the completion of the process. Now you have successfully installed the 5.1.1 Lollipop OS on your LG G4 H815. Hope you like out tutorial to Downgrade LG G4 H815 to 5.1.1 Lollipop. If you have any problem then ask in the comments section below. Now its time to go. Bye!!

If Device is Stuck at LG Logo or Boot Screen

If your device stops at Boot Screen or LG Logo or downgrading then you will need to hard reset your LG G4. By doing the hard reset all your data will be lost. For solving the problem, follow the instructions below to hard reset your phone.
  1. First of all turn off your phone.
  2. Now press and hold Power+Volume Down buttons for few seconds.
  3. When the LG Logo appears, quickly release the Power button only for a second and again hold the Power button.
  4. After that Factory Hard Reset Screen will appear and then release all the buttons.
  5. Now press the Power button to proceed and press it again to confirm the task.\

Friends, now your android device will return to factory condition after performing hard reset and it will boot up normally and your problem will be solved. Please note that your phone may take some time to show up home screen. Now our tutorial to Downgrade LG G4 H815 to 5.1.1 Lollipop ends here. 

Thanks for visiting Our blog.

Read More

Hey guys, First of all We're sorry for not posting from so many days. But now we are with many of new tricks that we had tested these days and now we are here with them.

Today we are going to show you people that how can you unblock torrent downloading if it is blocked. Most of office and college campus block their private networks like Facebook, Twitter, Torrent and all other entertainment website in order to avoid unwanted downloads. When you try to open any blocked page it shows some blocked page saying that "This site can't be reached" or "Access Denied". So to overcome this we are here with a cool trick that will help you to sort this out.
So here we are :

To download from torrent you need a .torrent file.You can find them on the Torrent search engine like https://torrentz.eu. But search engines like this are blocked in campuses and offices. In that case we have to bypass the college/office proxy by using any proxy website.

To bypass proxy go through the following steps :

Step 1 : First of all go to any free proxy websites like http://proxysite.com.


Step 2 : Select the server and enter the url of the website you want to bypass, in the address bar provided in that proxy website.

Step 3 : Now click on the GO button.

Step 4 : That's it now you have been bypassed to the blocked webpage.


5. Now download your file without any interruption.

Keep visiting our website and give your precious comments :) 

    
Read More


Hello Guys,
Today in this tutorial we are going root and install Xposed on Android One running on Android Marshmallow 6.0.1. As you may lost your root access and xposed on your device due to the recent update of Android Marshmallow, so we are here with this method that allows you to root without losing stock recovery and it also works with both locked and unlocked bootloader.

For your safety you must perform a Nandroid Backup

So guys, Let's start the steps :

Step 1 : First of all you have to download some requirements :


After downloading above files copy the boot.img in Minimal ADB and Fastboot and then copy all files in your SD Card. Also rename TWRP Recovery file as twrp.img and Philz Recovery file as Philz.img.

Step 2 :Make Sure that you have ADB drivers installed a your PC. If not, install them from here.

Step 3: After that power off your mobile and get into Bootloader by pressing Vol Up + Power button and select Fastboot and connect it to PC.

Step 4 : Then open Minimal ADB and Fastboot shortcut created on your desktop and check the device connected or not by typing "adb devices" on command prompt.

 Step 5: If your device is connected you will get device info like "device     LSXXXXXXXX" and if it doesn't occurs then try a good cable or wait for the new installed adb drivers.

Step 6: After that type the following command to flash kernal  "fastboot flash boot android_one_6.0.1_modified_boot.img" and wait for some time.

Step 7: Type the following for flashing the temporary/one time use recovery   "fastboot boot twrp.img" for TWRP Recovery and for  Philz Recovery, type "fastboot boot philz.img". Doing so, type this for Permanent Custom Recovery "fastboot flash recovery twrp.img" for TWRP Recovery and "fastboot flash recovery philz.img" for Philz Recovery.

Note : Use same Recovery file in both temporary and Permanent Custom Recovey. You can use any recovery.img other than TERP and Philz (But TWRP is recommended by me).

Step 8 : Then flash the Zip file and after flashing Reboot your phone.

Congrats, Now your phone is Rooted and Xposed is installed on your Android One.

For any Query, contact us we would love to hear from you :)
Read More


Hey guys, tody we are here with a new trick that is going to show that how can you change your ip adress in a Android phone in a easiest way. The main benefit of this trick is that even root is not required so it will work in any Android phone.

Normally, IP Address is to be changed to visit blocked sites and unblock them yourself and many other security purposes but guys you do not have to missuse this trick as you may be hacked by others but it will not happen if you use this trick for normal reasons.

We are going to use this trick through an app that can change your IP Address in to many countries.
In reality, the app uses VPN to change you IP but it is much much better than any other VPN apps and the best part of it is it's free of cost.

So be ready and follow the instructions given below :

Step 1 : First of alldownload Hide My Ip app.
Step 2 : Open it and select any country.


Step 3 : Wait few second till itconnects to the server.


Step 4 : Now you are done and you can easily visit the blocked sites.


Confirmation!!!  For confirming that your IP Address is changed just click on menu bar of app and select verify IP from google chrome or any other browser then Google will instantly show your IP Address.


Guys don't hazitate to discuss your problems with us we would love to hear from you, for now enjoy your blocked websites :)
Read More


Hey Guys, today our tutorial belongs to the Play Store's Insufficient Space Error. We are going to guide you by some steps thorough which you can overcome the error.

This error comes when your phone memory is near to full.

And it's a common problem in Android specially in Lollipop Version. Because it uses ART Run time and apps take more space than their original size.

So we are here to tell you what you have to do to get more memory in your internal by cleaning cache.

Some of the best methods are discussed below so go through them : 
  •  Uninstall Unneeded Apps
  •  Move all movable apps & games to external storeage card or move immoveble apps using link2sd to your external storage.
  • Download App Cache Cleaner and clean all apps cache.
  • Now, you are done and 


After doing so try to download app from Play Store and if you done then it will not give you Insufficient Space Error and if you are still getting that error that means your internal storage is very less so we recommend you to try Factory Data Reset.

If you need help or you have any question in your mind then drop your comment below.
Read More
Marshmallow 6.0 is interesting and for all those users who have already updated Marshmallow 6.0 Android OS in their devices may just want to know on how they can roll back to the official Lollipop 5.1 Android OS. or you have updated your nexus device and now wants to back in lollipop due to following reasons we will help you to back in lollipop.


If for some reasons you hate Marshmallow or it is creating following problems in your nexus you should downgrade your android version with trick mensioned below

WIFI Mac Issue : In the latest Beta 3 release of Marshmallow 6.0, WIFI MAC address changes upon after every reboot.

Battery Drain and Heating Issue : Battery in Nexus 9 drains no less than water. For us in Marshmallow the device started heating which led to faster battery drain than in normal condition.

Force Close Issue : Even though it was a clean install, apps like twitter and Google Play Services are giving force close issues.

Pre Requisites before Downgrading from Marshmallow :

  Note : Make sure that you take a backup of all the data in your device as updating the device firmware will wipe your phone completely. With the help of below apps/ tips you can backup data present in your device.

SMS – SMS Backup & Restore
Call Log – Call Log Backup and Restore
Photos, Music and Videos – Take manual backup in your computer,
App Data – App history can be found in Google Play Store but the downloaded data in your apps will be lost and will have to be downloaded.

Keep in mind that battery left in your device should be a more than 50%. Make sure that ADB is properly configured in your computer. Without this it’s not possible to perform this downgrade.
Let’s proceed to the next step we have mentioned steps to downgrade the OS in your device.

Guide to Downgrade to Lollipop 5.1 from Marshmallow 6.0:

Download Lollipop 5.1 OS from the below mentioned link for your appropriate device.
  • Once downloaded, extract the folder on Desktop.

  • Open the folder to extract the zip file as shown in the screen capture below.

  • Now, in your Windows computer press Shift + Right Click to select the “open Command Prompt here” as shown in the below screen grab.


  • Once done, turn Off your Nexus device so that it can be entered in the bootloader mode. Press Volume Down + Power Button in your Nexus device to enter the same.
  • Connect your device to computer with original USB cable and execute the below commands one after other to downgrade the device to Lollipop OS.
  • fastboot flash recovery recovery.img
    fastboot flash boot boot.img
    fastboot flash cache cache.img
    fastboot flash userdata userdata.img
    fastboot flash system system.img
    Please note that post executing all the above commands, it will take around 3 -4 minutes for rebooting the device and show the language preference. It may even take longer time sometimes.
    Now you  are in Lollipop.

    Please give us your precious comments. Thanks for visiting our post...


    Read More
    Hey friends we are again here with our new trick that will take you from buggy Marshmallow to a stable Lollipop version.

    Remember : This tutorial is for only Samsung Galaxy S6 and a few other Samsung devices. If you guys are disliking Marshmallow in Samsung Galaxy S6 then you have to just go through these simple steps and you can easily downgrade your Smartphone to Lollipop Version.


    So without wasting your time friends, let's start with the tutorial :

    Step 1 : Download, Extract and Install the Samsung USB Drivers and then reboot your phone.
    Step 2 : Enable Developer Mode on your smartphone (visit here to see how to enable developer mode).
    Step 3 : Enable USB Debugging on your Galaxy S6 (from developer mode).
    Step 4 : Download Samsung Kies and back up your phone.

    Step 5 : Download Lollipop Firmware from Sammobile and unzip it.
    Step 6 : Download and extract Odin.
    Step 7 : Power off the phone.

    Step 8 : Press and hold the following buttons in order : Volume Down + Home + Power. Keep holding them until you see a screen that says "Warning!!!" at the top and then press the Volume Up button to continue.
    Step 9 : The next screen will show the Android logo and say "ODIN MODE" at the top left.
    Step 10 : Run Odin as administrator. Under the Options, only "F. Reset Time" should be checked.("Uncheck"Auto Reboot").Step 11 : Click the "AP" (or "PDA") box and browse for the extracted firmware file.
    Step 12 : Now connect your phone to your computer via USB.
    Step 13 : Wait until you see your phone plugged in.
    Step 14 : Press Start in Odin. 
    Step 15 : When Odin is successfully finished, you will see in the Message box "All threads completed" (it may take several minutes to complete so be patient and don't turn on the phone.
    Step 16 : Press in order: Volume Up + Home + Power until you see an Android screen.
    Step 17 : Use Volume Down to scroll to "wipe data/factory reset" and press Power to select it. (Make sure you have backed up your phone!)
    Step 18 : On the next screen, scroll to Yes, select it, and your phone will reset.
    Step 19 : When it's done, select reboot system now and it will reboot.
    Step 20 : Restore your data using Samsung Kies. This will restore most of everything; you may need to re-setup the home screens and some of your settings.

    And that's it, you are done now ask for any queries if you have and if don't just share this post and enjoy your Smartphone :)
    Read More
    Related Posts Plugin for WordPress, Blogger...

    Recent Posts

    Hackers Tools

    Contact Us

    Name

    Email *

    Message *

    Translate

    Back to Top

    Followers

    Back to Top

    Total Pageviews

    ©Cppyright Amazing Hacks...- All Rights Reserved.